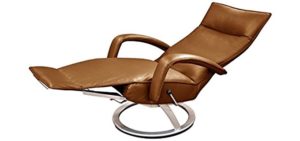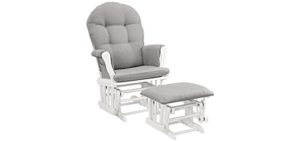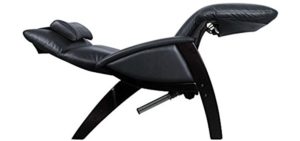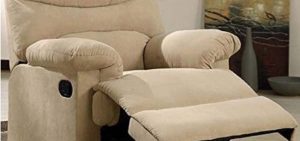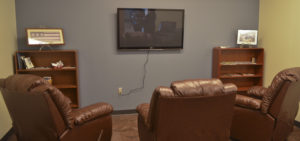
A recliner is one of the most cherished and overused furniture in homes. Its ability to recline to your desired position makes it more preferable to a traditional couch. On weekends or after a long day at work, one of the comforts you look forward to is sitting down on your recliner to watch the television or lounging to relieve stress. Due to this usage rate, wear and tear from aging, and delicate parts of modern recliners, the chances and risks of a breakdown are not that far off.
If, unfortunately, your recliner suffers some form of damage due to any of the above reasons, you do not have to throw it away. You can decide to call in a reputable recliner repairman to come to your aid. With the necessary DIY skills, you can also repair the recliner by yourself with little or no help. Fixing a recliner is usually very easy and takes only a few minutes, making time investment insignificant.
However, you need to identify the problem and where it occurred before deciding what corrective measures are necessary. Then, you can assemble a few tools and repair the recliner. With the right tools and helpful tips, the process becomes fast and easy. If you feel it has reached the end of the road, you can check online for another excellent recliner that will meet your needs and suit your preferences.
General Tips on Repairing your Recliner
To guide you in your quest to get your recliner to look as good as new, we have provided you with some necessary DIY repair steps.
- If the recliner has a warranty that covers the problem at hand, take advantage of that and get the recliner fixed by professionals at no cost to you.
- The replacement of a broken part should be with a durable and reliable product for the long term. It prevents continuous replacement of that particular part, allowing you to enjoy your recliner more.
- Fixing or correcting most electric recliner faults and errors are possible using the reset button on the motor’s remote or elsewhere. It is especially useful when the system shuts down due to a power surge or outage.
- If you discover any loose or worn out screws, tighten them with the right type of screwdriver. If there are missing screws, figure out the size and replace them with fitting ones.
- Repair cracks in the wooden base with wood glue and then clamp it down until the adhesive dries. A broken wooden frame can be patched or rebuilt.
How to Repair Different Parts of a Recliner
The significant parts of a recliner bound to breakdown, primarily due to old age, are the seat springs, cable, pull handle, footrest, upholstery, and padding. The factors that can cause this breakdown range from simple to unbelievable and intricate. Below, we have listed some of these problems and ways you can fix them.
To Replace the Pull Handle of your Recliner
The pull handle is one of the most uncomplicated faults you can fix at home without requiring a professional to look at it. Your recliner would be missing its most essential function without a pull handle and will remain stuck in one position. If you suspect your pull handle is faulty, since your footrest is not working, you can repair it with some tools in a few steps.
Tools Required:
- Screwdriver/Wrench
- Replacement handle
- Needle nose pliers
While keeping the recliner footrest closed, flip the recliner down with the help of a friend if you cannot do it alone. Locate and remove the screws that keep the handle in place using the screwdriver. Keep the screws carefully in a safe place and gently pull out the handle to avoid damaging the upholstery. You should also remove the escutcheon, which is a protective cover under the handle. Once you get your replacement piece specific to your recliner model (or a universal alternative), attach it by tightening the screws. Turn the recliner to an upright sitting position and check if the pull handle is working as it should. Further tips are available in our detailed guide.
To Fix a Lever
If your recliner uses the lever-reclining system, the repair should be much more straightforward than a pull handle. Often, your recliner’s lever gets loose or broken due to a violent pull. When this happens, the footrest and backrest get stuck in a particular position and cannot move. The tools needed are the same as the pull handle, but a lever replacement is used instead of a handle.
Instructions
Turn the recliner upside down and inspect the lever’s connection to the reclining mechanism. It helps you confirm if the part is broken or loose. Find out the manufacturer and model number of your recliner, then obtain the appropriate type of replacement lever needed. When you have this handy, search for the screw or bolts that connects the lever to the recliner. Loosen these components and keep them aside if they are still good. If worn out, find new ones of the same size. Remove the lever and the escutcheon cover on it. Replace them with the new lever and escutcheon, screw tightly, and return the recliner to the natural position. Check if the lever is working correctly and if you have replaced it successfully. You may need to ask a friend or a professional recliner technician to look it over if the problem persists. Take it to the manufacturer’s shop if the warranty has not expired.
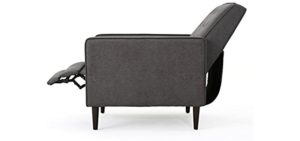
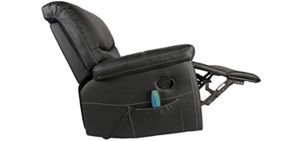
To Repair a Recliner Footrest
Your recliner’s footrest has multiple parts that could need attention, especially for those that do not perform routine maintenance. If you slam the footrest down very hard, it may break or weaken. The problem that could arise includes the footrest being stuck in an open position, refusing to stay up, or refusing to latch into place. You can quickly fix a footrest problem with the right tools and an understanding of how it operates. If a loose or worn-out screw is the problem, you can either tighten or replace it. If the footrest moves with difficulty and squeaky sounds, you may need to lubricate the parts. Frequent lubrication helps keep the recliner footrest in good condition
Tools Required:
- Lubricant oil
- Replacement screws, springs, and ratchet
- Screwdriver
- Disposable or old cloth/newspaper
Instructions
If your footrest gets jammed in a position, chances are the springs or the ratchet are at fault. You will need to flip the recliner while the footrest is entirely open. It helps you see the mechanism of the footrest. Loosen the screws, pins, and springs so that you have easy access to the ratchet. Locate the ratchet and remove it together with the bar attached to it. Test if the footrest can now move freely. If it can, then you should replace the old ratchet with a new one. Tighten with the screws and if any screw is worn, replace it too. Cover the recliner with old newspapers or cloth, so the upholstery is protected, and lubricate the joints. Turn the recliner to a sitting position check if the footrest now moves in the right way. You can find more detailed information here.
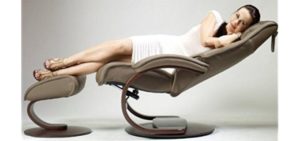
To Fix the Recliner’s Seat Springs
The springs under the seat of your recliner keep it steady, flexible and allow you to relax comfortably on it. These springs keep you from sinking deeply into the cushions. Due to age and use, it may slacken, generate annoying squeaks and sounds, or break. When this happens, get ready to open your repair kit and change the faulty springs. To repair it, you need the few tools listed below.
Tools Required:
- Pliers
- Wrench
- Screwdriver
- Replacement springs
- Eye goggles
- Flashlight
Instructions
Turn your recliner upside down so that you can see the framework under the seat. Use a flashlight or work in a well-illuminated room. Ensure the footrest is closed and the recliner backrest is in an upright position before turning. Look for the four spots where the springs are attached to the recliner by bolts and identify any overstretched or broken piece. Loosen the bolts and remove the base of the recliner together with the backrest.
Unscrew the place where the reclining mechanism connects to the frame and search for the cable that controls the reclining mechanism. With the pliers, remove the wires to allow unrestricted access to the springs. If the damaged ones are screwed to the recliner structure, unscrew them and insert the new spings. Be careful if the springs are under tremendous tension because they may snap and cause injury. Put back the cable, then the reclining mechanism, ensuring that the screws holding them are tight. Turn over the recliner and test it.
To Adjust a Slightly Tilted (Lopsided) Recliner
Several factors could be at fault if your recliner is lopsided and wobbling or leaning to one side, from a loose to a broken part. Start by seeing if the base is at the same level on all four sides. If not, place a balance such as a thin piece of wood, a cloth, or folded paper under some of the legs to make it level.
If this does not work, turn your recliner over and examine the springs and the metal frame to see if any part is loose. Tighten or replace them depending on which is needed.
To Repair the Cable
Have you ever tried to lean back on your recliner, and the backrest moves like it has a mind of its own? Sometimes it takes too much time to recline or refuse to do so at all. It may also decide to recline so fast without any prompt from you. This problem can be annoying, especially when you want to sleep on your recliner. To check for broken cables, first, loosen the cable stop. Then pull the wire to see if it is in place against the piston bracket. Tighten the cable stop and test the recliner to see if it is working well.
If it is not yet moving well, you will have to change the cable. Flip the recliner and remove the screws on the footrest. It would help if you also unscrewed those that fasten the squab to the frame of the recliner. Please take off the squab and the cable, attach a new one and set the recliner to its natural position.
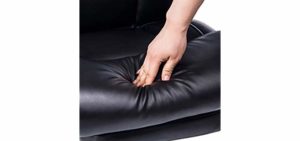
To Repair Torn Upholstery
If you have pets and children that play around your recliner, a tear here and there is bound to occur. Apart from the above, wear and tear occur due to old age, especially around the seating area. If the tears are minor, you can repair it with a needle and a nylon thread. This thread is more durable than regular ones with the appropriate color. For large holes, patches are ideal. Find fabric patches that match the color and texture of your recliner. To do patch repair, below are the necessary tools and steps.
Tools Required:
- Scissors
- Fabric patches
- Fabric glue/adhesive
- Upholstery needle
Instructions
Cut the patch to be slightly larger than the worn or torn area. Slide the patch under the torn part of the upholstery, apply the fabric glue or adhesive to the ripped edges, and smoothen it into place. Wait for the glue to dry, and your recliner is ready to be used. If your upholstery needs total replacement, you can contact an upholstery company.
In Conclusion
For fixing or repairing a recliner, the key is knowing the cause of the problem. A study by researchers from Durham University, England, found that “consumers have different competences with respect to the practices of object maintenance.” It can be daunting due to the numerous moving parts of a recliner. But you can use trial and error to solve the problem when you find it. Waiting for your recliner to develop a fault before you take care of it is unwise, especially if it is valuable to you.
At intervals, inspect the chair, listen for squeaks, search for cracks, and try to fix the minor details as soon as they occur. With the right tools, you can save much money rather than hire a technician/maintenance specialist.
However, if your recliner is still not in a proper working condition after replacing worn-out parts, it may be time to call in the professionals. They will help you determine if it is time to haul away the recliner and get a better one.
Please Rate this Article:
Table of Contents