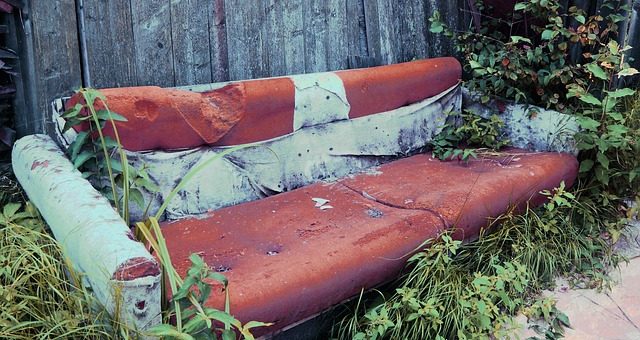
So your comfy, favorite recliner chair has come to the end of its journey, it is dull, dirty and ripped and torn at all ends. Now you are faced with the unfortunate decision of replacing your old friend or, just maybe, you can invest in reupholstering repair.
The most important factor that any consumer should consider before having their furniture reupholstered is the quality and sentimental value of the piece. Consequently, in many cases, it costs more to reupholster and repair a recliner, than to replace, however, in some cases where you have a recliner that is of impeccable quality, of which the framework and rest of the parts are still in mint condition, the best option is rather to reupholster.
In this article, we will discuss when you should rather reupholster than replace, and also look at a few methods of reupholstering your recliner;
Reupholstering VS Replacing Your Recliner
Everyone who owns a recliner, at some point in their lives will accordingly come to face the decision of reupholstering or replacing their beloved recliner. Bearing in mind that a good quality recliner should last to around ten years, even with everyday use.
Just because your recliner is dull, dirty and worn out with ripped fabric does not mean the framework is damaged. Any good quality recliner of which the framework and motor or mechanical functions are still in good order should be considered for reupholstery.
Maybe your recliner is still in good condition but you only want a change of scenery, or want to change your décor, this is also a good reason for reupholstering.
On the other hand, if your favorite recliners seats start sagging, the frame starts squeaking and breaking and the mechanics no longer work, then this is a good sign that it is time for a new recliner!
Trying to repair an uncomfortable recliner that is weak and in poor shape, is just not worth the money in comparison to obtaining a new one.
Cost of Reupholstering Your Recliner
But, first off all let us revise the question weighing down on everyone’s mind, What is the Cost related to Reupholstering?
A full overhaul for your recliner, involving restuffing, reupholstery and some repairs to springs and the backboard could cost between $700 and $1200 or more, whereas replacing one cushion could be around $185.
The cost will also be determined by the type of fabric that you are going to be using, the fabric can cost between $11-$44 a yard, you will need round about seven yards, and then of course if you have to hire a professional.
Reupholstering the recliner yourself is quite possible and may save you on labor costs, so that is also something you can consider, if you have the time and patience, regarding that you will need the right tools and equipment for the job.
Which leads us to my second question;
Should You DIY or Hire a Professional
Using a professional to me is always the best option if you can afford it. Generally, you either visit a reupholstered, or email them a picture of your recliner, and they will email you back estimates on labor and some fabric options.
The amount of fabric that you will require depends on the style and size of your recliner, and you will need to purchase fabric whether using a reupholstered or not.
Should you not have the funds for a professional, doing it yourself can be challenging and very time consuming, but fortunately with internet technology today, there are plenty of DIY videos on youtube that you can follow. Make sure that you have all the tools and equipment required, along with adequate fabric and you are ready to go!
How to Find a Good Reupholsterer
If, however you decide to use a professional, the best way to make a conscious choice is to get referrals from family members or friends, otherwise to look at reviews on different companies, Facebook can help in this respect.
When you visit a reupholstery company, take note of how long they have been in business, and ask to see some samples of their work.
When you have finally decided on the perfect reupholster for the job, make sure to ask;
- What are their pickup and delivery charges, and if they do pick up and delivery?
- Is your recliner worth reupholstering from a professional point of view?
- Are they going to remove the existing fabric?
- What is their turnaround time?
- Are there going to be any other additional costs?
How to Reupholster a Recliner Yourself
And for those who have chosen to reupholster their recliner themselves, here are two methods and a YouTube video that should be of tremendous help;
Method 1
What you will need;
- Fabric Glue
- Pliers
- Clamp
- Upholstery or Curved Needle
- Upholstery or Quilting Thread
- The correct amount of fabric
Finding the Right Fabric
You can either purchase a piece of fabric or try a yard sale or second-hand store, you might find some great specials there!
For any recliner seat, you should always measure the fabric larger than where you are going ta lay it, try to leave about half an inch on the left, right and front part and 4 inches on the back of the recliner.
Gluing the Fabric Down
Use a good quality fabric glue, lay down a thin layer all over the vinyl surface starting from the middle working outwards. Lay the fabric on top of the vinyl gently and press down, making sure to smooth out all the creases.
Stitching The Edges
For this part, you will need an upholstery needle or thick curved needle, and button craft thread or a heavy duty thread like upholstery or quilting thread.
After you have folded down the edges of the fabric where you want to sew, push the needle down and bring it up again from under the vinyl and fabric, you may need to use a pair of pliers for this.
Carry on with this push and pull method, you can stitch fairly far apart, make sure that it looks even.
In the end, the fabric needs to be securely attached to the edges of the seat.
Glue Down The Corners
Now you can cut small triangular shapes off the ends of the corners and fold them around, and under, spreading a small amount of glue underneath the fabric on the vinyl. Use your clamps to secure the hold and continue to sew the edges.
Finishing Off
The last step after you have sewn down the edges on the sides and front is to secure down the back part.
Spread some glue on the vinyl at the back, in a thin line, and tuck in the extra fabric between the seat and the back of the recliner. This in turn, helps to give some slack on the fabric when someone sits down.
And there you have it, a brand new recliner!
You can also use the extra pieces of fabric to make some charming, matching scatter pillows!
Below is a video with another example on reupholstering DIY;
Method 2
This is a more detailed method, here is what you will need;
- A Flathead screwdriver
- A pair of Pliers
- New piping, or reuse from the recliner.
- New or second-hand fabric the correct measured size.
- Curved or upholstery needle.
- A few Metal Tack Strips, or reuse those in your recliner.
- Heavy Duty upholstery or quilting thread.
- Good Quality Fabric Glue
- Upholstery Tack Strip or some Cardboard Tape
- A small Upholstery Pneumatic Stapler with an added air compressor.
Now simply follow these simple steps;
- Measure out the fabric for each part of your recliner adding an extra half an inch to the measurement. Layout and label the parts for easy assembly.
- Remove the lever under the recliner, unscrew it and pull it off, make sure to take a picture of how to reassemble the frame.
- Start to rip the seat cushions at the seams, removing the fabric from all the parts of the recliner.
- Apply the fabric glue to your fabric design, and lay it on the matching part of the recliner.
- Use your pliers, needle, and thread to stitch the fabric firmly on to each part of the recliner. Use the push and pull stitching method, making sure to use neat, and even stitches that are reasonably spaced apart.
- Lastly, after you have covered every single part of the recliner, with the new fabric, you can reassemble the recliner, using the photos that you took. Make certain that you tightly screw on all the parts, to prevent them from coming loose or breaking.
And there you have it! A step by step easy DIY method!
Using a Recliner Slip Cover
It is always a better idea to protect the existing fabric on your recliner with a cover, which will lessen the chances and frequency of it having to be upholstered.
Because of the recliners increasing popularity, more and more people are purchasing this comfortable, and elegant piece of furniture today. Therefore it is almost imperative, to have a cover if you want to keep your recliner in exquisite condition.
You can either use a normal throw to cover your recliner, which will help but has much more chance of folding or coming off, or you can settle for the proper recliner cover, which will sit all the time perfectly.
Advantages of a recliner Cover
One thing about recliners is that they got dirty and worn out over time, spills and accidents happen.
Particularly because a recliner is one of the most used items of furniture in your home, it makes sense to protect it at every cost.
A recliner cover not only maintains the original look of the fabric from wear and tear, on your recliner but also protects against spills, stains, and scratches to the material.
Then again, you can change the entire look of your recliner just by using a recliner cover or cover a worn out old recliner with a new cover to make it look brand new.
You can also add extra protection to your leather recliners by using a Recliner Slip Cover for Leather Recliners, which is designed specifically to fit a leather recliner and has a non-slip feature.
Features of The Best Recliner Slip Cover
Most recliner Slip Covers are one size fits most, and are waterproof, however, there are a few features that you can also look for in a decent Slip Cover;
- An adjustable fit.
- Attractive colors that fit your home décor.
- It is machine washable.
- Comfortable and soft fabric.
- Wrinkle-free.
- Durable and long lasting.
- Is able to cover most types of reclining Chairs.
- Protective and easy to clean.
- Fully elasticized and slip resistant.
- Comes with clear instructions on set up.
- Offers good protection against pet hair.
- Works well and is easy to use.
- Thickly Layer.
- Good value for money.
These are just a few things to look out for in a well deserving Slip Cover for your recliner.
Step By Step Video on How Cover Your Recliner with a Slip Cover
When you have decided on the Slip Cover that you want, here is a video on how to put it on your recliner;
What To Expect in The End
When considering reupholster every individual need to have very clear and realistic expectations as to the cost of hiring a professional and the amount of time and work involved in doing it yourself. Confirm that reupholstering is the correct and most affordable way to go, if not rather replace an old recliner.
Remember also to reflect that a reupholstered may not always be able to duplicate your factory recliner exactly!
Using a recliner Slipcover is the best and most affordable way to protect your recliner, and it can also be a solution to old and worn out upholstery.
Following these suggestions, you should be able to rescue or replace your old favorite, comfy recliner seat!
Please Rate this Article:
Table of Contents